はじめに
この記事では弊ブログサイトを作るにあたって参考にした記事や公式ドキュメントを紹介する。誰でもわかりやすいような解説を目指すが、あくまでも備忘録であるため個別の質問等には応じられない可能性がある。
jimmy氏作のStack themeを使用してブログページを作り、windows11のVisual Studio Codeからgithubのレポジトリにcommit&push、そしてcloudflare pagesでビルドとデプロイをすること目標としているものと想定して解説をする。
また、完成形はStack themeのデモページを目指すものとする。
追記 : ブログのカスタムとか
この記事の手順自体には問題はないのですが、完成形としている「こは雑記帳」は一部カスタムしています(シェアボタンの追加、いいねボタンの追加など)。カスタムの簡単な解説は別ページで解説しているので、よければそちらも読んでみてください。
Hugo + Stackのブログにシェアボタン実装した
筆者の環境
・Cloudflareでドメイン取得済み
・メインPCのOSはWindows11
・Cloudflareの各種サービスはある程度の利用経験あり
・Linux及びWindowsの最低限のコマンド知識はあり(ディレクトリ移動やnano、touchなど)
・Gitの最低限の使用方法がわかる
開発環境
結論 : Windows使ってるならWindowsで作ろう
当初は自鯖でホスティングしようと思っていたため、Proxmox上にLXCを建てて開発環境を作った。しかし、結局Cloudflare Pagesを利用したため、開発環境はWindows11(x64)で作るものとする。
Cloudflare Pagesを使わずにgithubのwebhookを使ってビルドとデプロイを自動化するスクリプト書こうと思えるなら話は違うけど、楽に作るならcloudflare pagesがオススメ。
Hugoのインストール
基本的にHugoのWindows用公式Docに沿って書くだけなので、これが読めてわかる人は読み飛ばしてもらっても問題ないかも。
前提条件
Hugoをインストールする前に、いくつか必要になるものがあるためそれらをインストールする。
gitのインストール
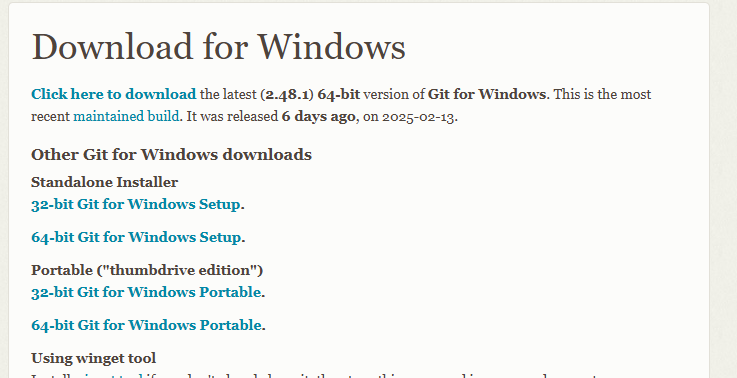
①まずgitのダウンロードページにアクセスする。
②Windowsを選択する

③64-bit Git for Windows Setupを選択する。
④ダウンロードされたGit-x.xx.x-64-bit.exeを起動し、gitをインストールする。
⑤windowsのコンソールで
と入力し、git version x.xx.xの様な出力が得られればOK。
Goのインストール
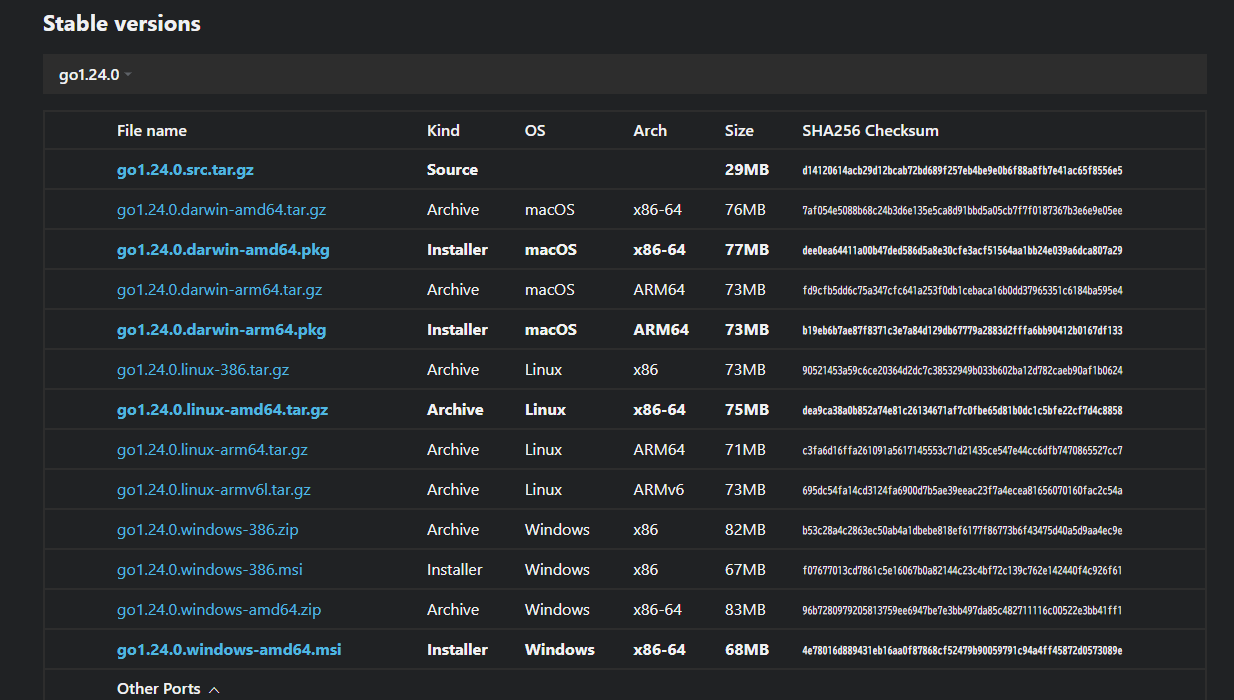
①Goのインストーラーダウンロードページにアクセスする。
②Stable versionsリスト内からgox.xx.x.windows-amd64.msiを探してダウンロードする。
③ダウンロードしたインストーラーを起動し、Goをインストールする。
④Gitと同様にWindowsのコンソールで
と入力し、go version gox.xx.x windows/amd64の様な出力が得られればOK。
Dart Sassのインストール
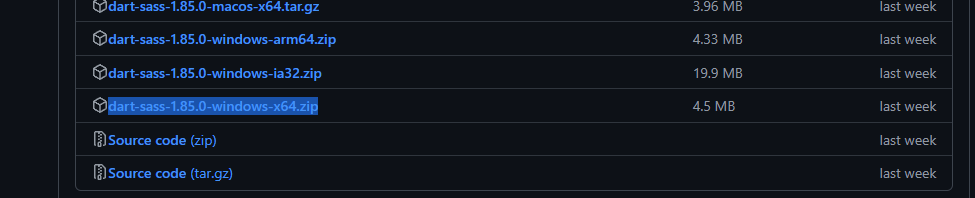
①Dart Sassの公式GitHubリリースページにアクセスする。
②最新バージョンのリリースからWindows用のzipファイル(例dart-sass-1.85.0-windows-x64.zip)を探してダウンロードする。
③ダウンロードしたzipファイルを解凍し、中身のdart-sassフォルダをわかりやすい場所(例 Cドライブ直下等)に配置する。
③Windowsの検索メニューから環境変数を編集のウィンドウを開く。
④ウィンドウ内のユーザー環境変数 or システム環境変数からPathを選択し編集をクリックする。
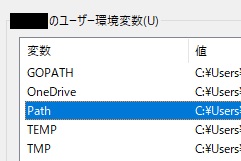
⑤新規をクリックし、入力を求められている部分に②で配置したdart-sassフォルダのパスを入力する。(例 Cドライブ直下に配置していた場合は、C:\dart-sass)
⑥前述の2つと同様に、Windowsのコンソールで
と入力しmx.xx.xの様な出力が得られればOK。
Hugo本体のインストール
前述の前提条件が全て揃っていることが確認出来たら、いよいよHugo本体をインストールする。
とはいってもこれは簡単で、Windowsのコンソールで
1
|
winget install Hugo.Hugo.Extended
|
と入力するだけでOK。特に問題が無ければ無事インストールが完了するはず。
インストール終了後は、前提条件同様にコンソールで
と入力し、出力が得られることを確認することを忘れずに。
注意事項
前項で得られたバージョン出力が0.123.0より大きい数字であることを必ず確認すること。0.123.0はこの後導入するStackテーマが動作する最低バージョンであるため、これが小さい数字になっているとテーマがうまく動作しなくなる。
Hugoでプロジェクト作成
ブログを作りたいディレクトリ内(例 Cドライブ直下)でコンソールで
1
|
hugo new site your_blog_name
|
と入力する。するとC\:your_blog_nameというHugoのプロジェクトフォルダが作成される。your_blog_nameは任意の名前に変えること。
テーマ追加
Hugoのプロジェクトフォルダが作られたら、今回使用するStackというthemeを追加する。
1
2
3
|
cd your_blog_name
git init
git submodule add https://github.com/CaiJimmy/hugo-theme-stack/ themes/hugo-theme-stack
|
それぞれのコマンドを実行することでthemeのフォルダが追加できる。
次に、デモサイトのコンフィグ情報をそのままyour_blog_nameに適用する。
rootディレクトリのhugo.tomlを削除し、新たにconfig.yamlを作成しVScodeなどで開く。
その中身にデモサイトconfigの中身を全部貼り付けるだけでOK。
弊blogで使っているconfig.yml | これをコピペしてもOK(SNSリンク欄、タイトル等の基本情報、footer情報、コメントセクションのオンオフを変更している)
  1
  2
  3
  4
  5
  6
  7
  8
  9
 10
 11
 12
 13
 14
 15
 16
 17
 18
 19
 20
 21
 22
 23
 24
 25
 26
 27
 28
 29
 30
 31
 32
 33
 34
 35
 36
 37
 38
 39
 40
 41
 42
 43
 44
 45
 46
 47
 48
 49
 50
 51
 52
 53
 54
 55
 56
 57
 58
 59
 60
 61
 62
 63
 64
 65
 66
 67
 68
 69
 70
 71
 72
 73
 74
 75
 76
 77
 78
 79
 80
 81
 82
 83
 84
 85
 86
 87
 88
 89
 90
 91
 92
 93
 94
 95
 96
 97
 98
 99
100
101
102
103
104
105
106
107
108
109
110
111
112
113
114
115
116
117
118
119
120
121
122
123
124
125
126
127
128
129
130
131
132
133
134
135
136
137
138
139
140
141
142
143
144
145
146
147
148
149
150
151
152
153
154
155
156
157
158
159
160
161
162
163
164
165
166
167
168
169
170
171
172
173
174
175
176
177
178
179
180
181
182
183
184
185
186
187
188
189
190
191
192
193
194
195
196
197
198
199
200
201
202
203
204
205
206
207
208
209
210
211
212
213
214
215
216
217
218
219
220
221
222
223
224
225
226
227
228
229
230
231
232
233
234
235
236
237
238
239
240
241
242
243
|
baseurl: https://your_blog_url/
languageCode: ja
theme: hugo-theme-stack
title: your_blog_name
copyright: your_name

# Theme i18n support
# Available values: ar, bn, ca, de, el, en, es, fr, hu, id, it, ja, ko, nl, pt-br, th, uk, zh-cn, zh-hk, zh-tw
DefaultContentLanguage: en

# Set hasCJKLanguage to true if DefaultContentLanguage is in [zh-cn ja ko]
# This will make .Summary and .WordCount behave correctly for CJK languages.
hasCJKLanguage: true

pagination:
    pagerSize: 3

permalinks:
    post: /p/:slug/
    page: /:slug/

params:
    mainSections:
        - post
    featuredImageField: image
    rssFullContent: true
    favicon: # e.g.: favicon placed in `static/favicon.ico` of your site folder, then set this field to `/favicon.ico` (`/` is necessary)

    footer:
        since: 9999
        customText:

    dateFormat:
        published: Jan 02, 2006
        lastUpdated: Jan 02, 2006 15:04 MST

    sidebar:
        emoji:
        subtitle: A Japanese student.
        avatar:
            enabled: true
            local: true
            src: img/avatar.png

    article:
        math: false
        toc: true
        readingTime: true
        license:
            enabled: true
            default: Licensed under CC BY-NC-SA 4.0

    comments:
        enabled: false
        provider: disqus

        disqusjs:
            shortname:
            apiUrl:
            apiKey:
            admin:
            adminLabel:

        utterances:
            repo:
            issueTerm: pathname
            label:

        beaudar:
            repo:
            issueTerm: pathname
            label:
            theme:

        remark42:
            host:
            site:
            locale:

        vssue:
            platform:
            owner:
            repo:
            clientId:
            clientSecret:
            autoCreateIssue: false

        # Waline client configuration see: https://waline.js.org/en/reference/component.html
        waline:
            serverURL:
            lang:
            pageview:
            emoji:
                - https://unpkg.com/@waline/emojis@1.0.1/weibo
            requiredMeta:
                - name
                - email
                - url
            locale:
                admin: Admin
                placeholder:

        twikoo:
            envId:
            region:
            path:
            lang:

        # See https://cactus.chat/docs/reference/web-client/#configuration for description of the various options
        cactus:
            defaultHomeserverUrl: "https://matrix.cactus.chat:8448"
            serverName: "cactus.chat"
            siteName: "" # You must insert a unique identifier here matching the one you registered (See https://cactus.chat/docs/getting-started/quick-start/#register-your-site)

        giscus:
            repo:
            repoID:
            category:
            categoryID:
            mapping:
            lightTheme:
            darkTheme:
            reactionsEnabled: 1
            emitMetadata: 0

        gitalk:
            owner:
            admin:
            repo:
            clientID:
            clientSecret:
            proxy:

        cusdis:
            host:
            id:
    widgets:
        homepage:
            - type: search
            - type: archives
              params:
                  limit: 5
            - type: categories
              params:
                  limit: 10
            - type: tag-cloud
              params:
                  limit: 10
        page:
            - type: toc

    opengraph:
        twitter:
            # Your Twitter username
            site:

            # Available values: summary, summary_large_image
            card: summary_large_image

    defaultImage:
        opengraph:
            enabled: false
            local: false
            src:

    colorScheme:
        # Display toggle
        toggle: true

        # Available values: auto, light, dark
        default: auto

    imageProcessing:
        cover:
            enabled: true
        content:
            enabled: true

### Custom menu
### See https://stack.jimmycai.com/config/menu
### To remove about, archive and search page menu item, remove `menu` field from their FrontMatter
menu:
    main: []

    social:
        - identifier: github
          name: GitHub
          url: https://github.com/
          params:
              icon: brand-github

        - identifier: twitter
          name: Twitter
          url: https://x.com/
          params:
              icon: brand-twitter

        - identifier: misskey
          name: Misskey
          url: https://misskey.io/
          params:
              icon: misskey

related:
    includeNewer: true
    threshold: 60
    toLower: false
    indices:
        - name: tags
          weight: 100

        - name: categories
          weight: 200

markup:
    goldmark:
        extensions:
            passthrough:
                enable: true
                delimiters:
                    block:
                        - - \[
                          - \]
                        - - $$
                          - $$
                    inline:
                        - - \(
                          - \)
        renderer:
            ## Set to true if you have HTML content inside Markdown
            unsafe: true
    tableOfContents:
        endLevel: 4
        ordered: true
        startLevel: 2
    highlight:
        noClasses: false
        codeFences: true
        guessSyntax: true
        lineNoStart: 1
        lineNos: true
        lineNumbersInTable: true
        tabWidth: 4
|
config.yamlを無事に作成出来たら、次はいよいよ開発用サーバーを起動する。
上記のコマンドをプロジェクトのrootディレクトリで実行することでlocalhost:1313に開発サーバーを起動できる。
-Dは下書きのポストも一覧に表示するためのオプションである。
お使いのブラウザでlocalhost:1313にアクセスし、テーマがきちんと適用されていることを確認しよう。
※筆者は-Dを起動オプションに入れずにサーバーを起動し、下書きポストが表示されず10分ほど無駄なトラブルシューティングをすることになったため、上記の通り実行することを推奨。
投稿作成
テスト用の投稿を以下コマンドで作成することができる。
1
|
hugo new content post/Hello-World/index.md
|
localhost:1313で記事が作成されていることが確認できるはず。
index.mdを編集し保存することでリアルタイムで記事の編集とプレビューができるのでとっても便利。
投稿のテンプレート作成
毎回index.md内でタイトルとかタグとか書くのは面倒なので、テンプレートを作成する。
./archetypes/default.mdを作成し、中身を以下の様な感じにする。
 1
 2
 3
 4
 5
 6
 7
 8
 9
10
11
12
|
---
title: '{{ replace .File.ContentBaseName "-" " " | title }}'
date: {{ .Date }}
draft: true
image: 'main.jpg'
categories:
  - カテゴリ
tags:
  - タグ
---

## 記事
|
これで、以降新しいページを
1
|
hugo new content post/post_name/index.md
|
で作ったときに、タイトルはpost_name、日時は作った時刻、ポストのメイン画像はpost_name/main.jpgを参照してくれるようになる。
カテゴリやタグは変更すること。また、公開する時にはdraft:trueをfalseに変えることを忘れずに。
デフォルトからのカスタマイズ
Demoサイトと同じものにするために少しカスタマイズをする。必要ないと思う機能がある場合は飛ばして問題ないものもある。
左のアバター画像の追加

解像度が150x150の画像を用意したらassets/imgにavatar.jpgという名前で突っ込んであげるだけでOK。最初はimgディレクトリはないので、自分で作って上げるとよい。
About・Archives・Searchの追加
それぞれthemeに機能として備わっているので、ページだけ追加してあげればOK。
丸パクリでOK
 1
 2
 3
 4
 5
 6
 7
 8
 9
10
11
12
13
14
|
---
title: About
aliases:
  - contact
menu:
    main:
        weight: -90
        params:
            icon: user
---

## 自己紹介

ここに自己紹介
|
- content/archives/index.md
 1
 2
 3
 4
 5
 6
 7
 8
 9
10
11
|
---
title: "Archives"
date: 2019-05-28
layout: "archives"
slug: "archives"
menu:
    main:
        weight: -70
        params:
            icon: archives
---
|
 1
 2
 3
 4
 5
 6
 7
 8
 9
10
11
12
13
|
---
title: "Search"
slug: "search"
layout: "search"
outputs:
    - html
    - json
menu:
    main:
        weight: -60
        params:
            icon: search
---
|
日本語フォントに対応させる
どうやらデフォルトだと中華フォントらしいので日本語に変える。
assets内にscssディレクトリを作り、その中にcustom.scssを作って以下の内容をコピペする。フォントは各自好きなものを使っても大丈夫。
1
2
3
4
5
6
|
:root {
  --sys-font-family: -apple-system, BlinkMacSystemFont, "Segoe UI", "Droid Sans", "Helvetica Neue";
  --ja-font-family: "游ゴシック体", "Yu Gothic", YuGothic, "ヒラギノ角ゴ Pro", "Hiragino Kaku Gothic Pro", "メイリオ", "Meiryo";
  --base-font-family: "Lato", var(--sys-font-family), var(--ja-font-family), sans-serif;
  --code-font-family: Menlo, Monaco, Consolas, "Courier New", var(--ja-font-family), monospace;
}
|
サイトのアイコン(favicon)を変更

faviconの作成方法については「favicon 作成方法」とでもググればいくらでも解説が出てくるのでここでは割愛する。
favicon.icoをstaticディレクトリ内に入れてあげれば適用される。
.gitignoreの設定
hugo用のgitignore設定があるので、これをそのまま使う。
rootディレクトリに.gitignoreを作成し、中身を以下にすればOK。
 1
 2
 3
 4
 5
 6
 7
 8
 9
10
11
12
13
|
# Generated files by hugo
/public/
/resources/_gen/
/assets/jsconfig.json
hugo_stats.json

# Executable may be added to repository
hugo.exe
hugo.darwin
hugo.linux

# Temporary lock file while building
/.hugo_build.lock
|
Cloudflare Pagesでの設定
Cloudflare Pagesのあれこれをする前に、your_blog_nameのgitリポジトリを作成し、commitやpushはしておくこと。
ググってもよくわからん人はchatGPTに状況をそのまま投げたら大体教えてくれるはず。
①Cloudflareのダッシュボード(https://dash.cloudflare.com/)にアクセスする。
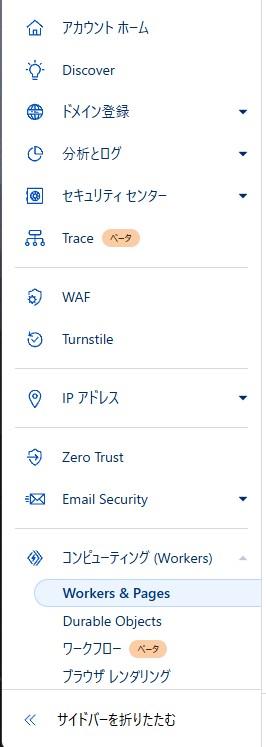
②左側のタブから「コンピューティング」を探し、その中の「Workers&Pages」をクリックする。
③「作成」をクリックして「Pages」を選択する。
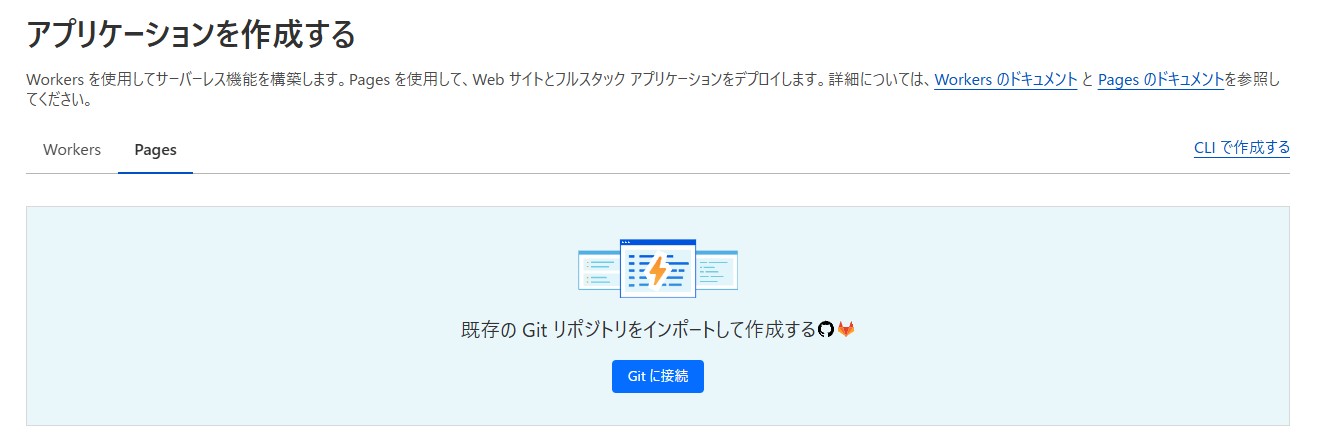
③自分のGithubに接続し、your_blog_nameのリポジトリを選択したら「セットアップの開始」を選択する。
④ビルドの設定では「フレームワークプリセット」でHugoを選択する。

⑤下の方にある「環境変数(アドバンスド)」を展開し、「変数を追加する」をクリック。
VARIABLE_NAMEはHUGO_VERSION・値は
で得られたhugo v0.144.1-a79d63a44659b6bc76dcdf223de1637e0bd70ff6+extended windows/amd64 BuildDate=2025-02-18T12:14:07Z VendorInfo=gohugoioなら0.144.1にする。
⑥「保存してデプロイする」をクリックするとページのビルドが始まるはず。
⑦ビルドが無事成功したら、「カスタムドメイン」から自分のドメインと適当なサブドメイン(blog.your.domainとか)を決めて完成。
ドメインにアクセスして内容が表示されるまでに少し時間がかかる場合があるので、焦らず待つこと。
これでgitのリポジトリにpushすることでCloudflare pagesが自動でデプロイする環境が整った。
終わりに
日本語解説ないだろと思って頑張って公式Doc読んでブログ作ったんですが、後から調べてみたら普通にあったんですよね。
この記事は先駆者兄貴と環境が違っていたりCloudflare Pagesで自分が詰まったところを追加しただけの内容なので、わかりにくかったら先駆者兄貴のも併せて見てみてください。